Stuffed Tomatoes
July 17, 2012
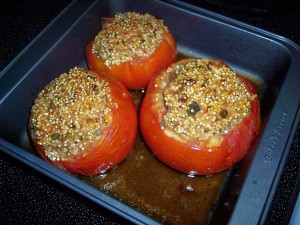
I first made this recipe about 6 or 7 months ago with grocery-store tomatoes and it was delicious. I have been anxiously waiting to try it out with homegrown tomatoes, knowing that it would be even better…and I was right!
I used quinoa to stuff the tomatoes because it’s a great source of complete protein but you could also use rice. The thing about the quinoa is that since you add it uncooked, after baking in the tomato juices it gets soft inside but has a great crunch on top.
The secret ingredient is the hot sauce, which, when baked, adds flavor without any heat. The almonds add a great texture too, especially if you use rice and miss out on the crunch from the quinoa. I buy the dry toasted slivered almonds from Trader Joes. They have a great taste, are easy to chop, and cost only $2.49 for an 8oz bag.
This is absolutely a must-try recipe for a great summer meal!
Recipe:
4 large tomatoes
1/2 c uncooked quinoa
1/4 c almonds, chopped
1 large or 2 small shallots, diced
1/4 c parmesan cheese
1 tbsp hot sauce
1 tbsp EVOO
few bunches of basil leaves (or 10-15 store bought leaves), chopped
salt and pepper to taste
1. Preheat oven to 350 degrees
2. Spray small baking pan with cooking spray
3. Hollow out the tomatoes and reserve 2/3 c of juices and flesh
4. Mix all other ingredients together in a bowl and add the reserved tomato juice/flesh Stir well.
5. Oil the outside of the tomatoes
6. Fill each tomato with quinoa filling. You can level it off with the top or, if you have extra, mound the filling up.
7. Bake 45 min for homegrown tomatoes or 1 hour for store-bought ones (homegrown are usually riper and softer so they can overcook if you bake for the full hour – as I did!). Check with about 15 min to go to be sure the tops are not burning…if so, lay a sheet of foil over the top. You want crunchy and brown but not burned!
Quinoa Summer Salad
July 10, 2012
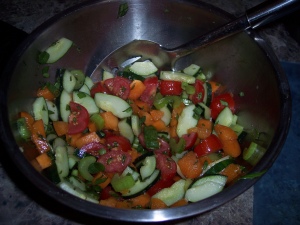
If you’re like me, sometimes during the summer it’s great to have a light, fresh dinner that doesn’t heat up your kitchen from too much stove or oven use AND helps to counteract some of the damage you may have done over certain holiday cookouts (and I do mean you, fourth of July party!). You will absolutely love this easy quinoa salad!
Some of you may not have ever heard of quinoa…I only learned about it in the last couple of years. It is a gluten-free grain, slightly similar in use to brown rice or couscous. The great thing about it, especially for vegetarians, is that it is the only grain that is a complete protein. It also has one of the highest amounts of protein per serving of any grain and you’ll find it listed among most current “superfoods”. Luckily, it also has a great taste (slightly nutty but not too earthy like some other less common grains). The texture has a good bite to it but it’s not hard or chewy. And, it cooks exactly like rice but in only 15 minutes! I buy the Trader Joe’s organic brand which is $3.99 vs Kroger or Publix where it’s over $7 for the same size box.
This is a great salad to make if you have homegrown tomatoes and cucumbers from the garden. And if your only experience with apricots is eating them dried, you’ll love the sweet ripe ones! Try this for dinner on a hot day or the day after a belly-busting holiday meal. It also makes a great lunch…easy to bring with you to work!
Recipe:
1.5 c uncooked quinoa – cook according to package directions
1 large cucumber
5 ripe apricots
12 grape tomatoes
2 avocados
2 celery stalks
1 lime
2 scallions
2 bunches fresh basil
EVOO
1. Cook quinoa (follow directions on package, usually a 2:1 ratio of water to quinoa, so 3 cups water if using 1.5 cups quinoa. Go for the longest cook time listed (ie. 15 min if directions say 10-15 min) to get the fluffiest end product)
2. Cut cucumber in half and then quarter each half lengthwise. Scrape most of the seeds off and then slice each quarter into bite size pieces. Place into large bowl.
3. Remove pit from apricots and chop into bite size pieces. Add to bowl.
4. Slice celery into bite size pieces and add to bowl.
5. Slice each tomato into 3 slices and add to bowl.
6. Slice scallions and add to bowl.
7. Mince fresh basil and add to bowl.
8. Add a drizzle of EVOO and the juice from one lime to bowl and stir to combine.
9. To serve, place some quinoa in a bowl. Top with a generous portion of veggie/fruit mixture. Slice the avocados and place on top (1/2 an avocado per bowl). Sprinkle with a little salt if desired. Stir up and enjoy!
Homemade Gluten-Free Gnocchi
July 3, 2012
This was my Saturday/Sunday recipe for last weekend. It’s alot of prep work but soooo delicious! I don’t have a pasta machine so this is as close as I get to homemade italian. The good news is that the gnocchi freeze very well so you can make up a bunch of them and then just freeze in batches. It only takes about 5 minutes to actually cook them.
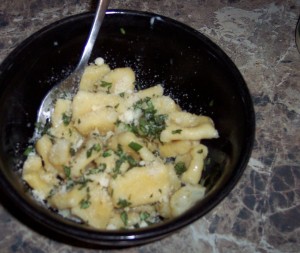
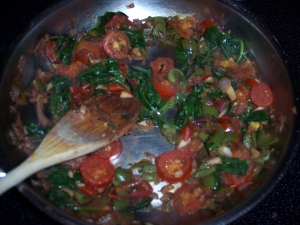
I was so worn out from making the gnocchi itself on Saturday that we just ate them with EVOO, fresh basil, and parm, as pictured above. Sunday, when all I had to do was boil the frozen ones, I made a “sauce” with spinach, garlic, onions, and tomatoes from our plant outside.
(btw, much better picture, right?)
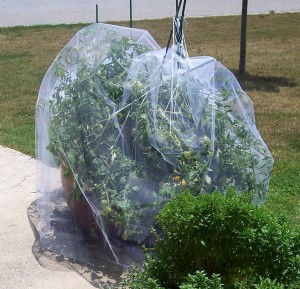
As an aside, my brother gave us 3 tomato plants around Easter which we planted and cared for tenderly and tirelessly over the past 3 months. This was no easy job since, unprepared for the gigantic size of even one plant, we planted all three in one big pot. After they quickly outgrew the metal cages, we used stakes and twine to hold the vines up. This took repeated meticulous work as the twine had to be redone weekly to accommodate the heavier and bigger vines. At one point, it got so heavy that one of the metal cages bent in half and an entire side of the plant was laying on the concrete. Well, our work was rewarded as the plants were filled with tons of ripe, ripening, and just-growing tomatoes over the last couple of weeks. I picked a few each day, wanting to leave them on the vine as long as possible until I needed to use them. Over the weekend, I noticed that a few of the tomatoes had what looked like small bites taken out of them, just one per tomato. We determined it was probably birds. I planned to pick all the ripe tomatoes yesterday so that no more would be ruined. Early yesterday morning I got my bowl and went out to load up. Something looked wrong. I didn’t see any red tomatoes. Maybe James had turned the pot for some reason and the side with the most was now facing the other way. I walked around the pot but no, there were no red tomatoes on that side either. Feverishly, I ran back in the house to see if maybe James had picked them all before he went to work that morning. Ahhhh! No tomatoes in the house!! And so furiously and dejectedly, I realized that deer had come stealthily during the night and eaten all of the ripe and barely ripe tomatoes that we had worked so hard for. There are still a decent number of green ones left, but overall less than 1/3 survived. So yesterday I went to hobby lobby and created this monstrosity in our front yard:
Bring it on, deer!!
But I have majorly digressed from the recipe at hand. I was just so excited to have used some of our tomatoes in this dish and so disappointed that there will be many fewer homegrown tomato dishes this summer than I had originally thought.
On to the gnocchi:
Recipe:
2 lbs russet potatoes
2 egg yolks, beaten
150g gluten-free flour (I love Bob’s Red Mill All Purpose Baking Flour)
1/2 tsp salt
1. Bake the potatoes at 325 degrees for 2 hours. Let cool
2. Peel and put flesh into a big bowl. Discard peeling.
3. Mash potatoes until only slightly lumpy.
4. Add four, egg yolks, and salt
5. Mix together by hand until dough forms a cohesive ball
6. Flour the work surface. Pinch off slightly-bigger-than-golf-ball-sized portions of dough and roll out into long tubes approximately 1/2 inch in diameter
7. Cut the tubes into bite sized portions (mine were slightly too big I think) and place on a sheet pan covered in waxed paper
8. If you want to quicken cooking time and help the sauce you’re using to adhere better, press down in the middle of each gnocchi with your finger to make an indention. If you made very small ones, this isn’t necessary.
9. At this point, you can freeze some or all of the gnocchi. Just place the pan in the freezer for a couple of hours. Then remove gnocchi from the pan and put in a freezer bag and replace in the freezer.
10. To cook gnocchi, drop into a pot of boiling, salted water. When they are done, the gnocchi will rise to the surface and you can remove with a slotted spoon. Drain either on paper towels or on a cookie cooling rack. Cook time is about 1 minute for fresh or 3 minutes for frozen.
11. Dress simply with EVOO, herbs, and parmesan cheese or try the sauce below.
Spinach and Tomato Sauce:
EVOO
1 onion, sliced
4 cloves garlic, minced
1 sprig fresh oregano, minced
1/4 – 1/2 c veggie broth
1/4 tsp each salt and pepper
6-10 plum tomatoes, sliced
spinach
1. Heat EVOO over med heat and cook onions and garlic until they begin to caramelize and are leaving browned bits in the pan
2. Pour in broth to deglaze the pan and scrap up the brown bits
3. Add in tomatoes, oregano, salt, and pepper and cook a few minutes.
4. Pile on a few handfuls of spinach and let it cook until wilted, stirring often
5. Cook until ready to use, around 5-10 minutes. Tomatoes should be starting to come apart and the whole mixture should be juicy looking.
6. Serve over gnocchi
Gluten-Free Pasta with White Wine Lemon Sauce
July 3, 2012
Let me preface this post by saying that I have no idea how to use my camera.
Clearly. And I’ve had it 8 years.
Besides, I said the blog was about food, not about my photography skills. Thankfully my smart husband (although I don’t think it should take smarts necessarily to have figured it out, just a lack of total dumbness which I obviously don’t possess) showed me a fantastic button on the top of the camera that is just for taking close up pics! Trust me, pics in all future posts will be unrecognizable as mine after this one.
OK, on to business…
I didn’t plan for it to take a week for me to write my first post however, life (and a broken air conditioner on the hottest day ever) interfered! So today I’m going to get up-to-date and post two recipes I made over the weekend.
If you are a pasta-lover like me, going gluten-free probably seemed to be the end of the world at first. I remember trying several gf pastas during the first month, all of which ended up as mush in the pot at the first touch of a spoon. Then I found this:
I swear it’s no different than regular pasta! It doesn’t have the flavor or bite that whole wheat pasta does but you can’t tell the difference between it and regular semolina pasta. It’s not even remotely mushy! I have tried the spaghetti and the elbow macaroni and both work great in every dish I’ve made! You can find this brand in the health food sections of Kroger and Publix.
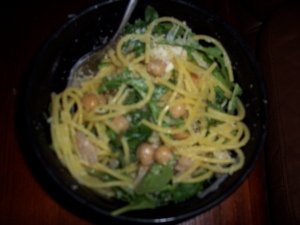
Anyway, my latest pasta dish is a sort of picatta, with lemon juice, white wine, shallots, and capers. I used chickpeas in this dish for added protein but if you are not vegetarian, it would be great with sliced chicken breast or chicken sausage (that’s what James put in his).
Recipe:
1 tbsp EVOO
3 shallots, sliced thinly
6 cloves garlic, minced
2 tbsp gf breadcrumbs (optional, see note at end*)
2 c veggie broth
1/3 c white wine
pinch of pepper and dried thyme
1/4 c capers with brine
juice of 2 smallish lemons
1 box gf spaghetti (the brand I use comes in 8oz boxes)
arugula
2 cans chickpeas, drained (or whatever protein you like if using as main dish)
1. Heat EVOO in pan over medium high heat. Sautee shallots and garlic until starting to caramelize, about 8 minutes
2. Add breadcrumbs and cook another 2 minutes
3. Add broth, wine, pepper, and thyme
4. Bring to a boil and cook for 7 minutes, boiling entire time
5. Cook pasta according to package directions
6. Add chickpeas and capers to shallot and broth mixture and simmer 3 more minutes
7. Stir in lemon juice and remove from heat
8. Serve by placing a handful of arugula in a bowl, top with hot pasta and then a serving of the sauce. Top with parmesan if you like. You can wilt the arugula by stirring it in with the sauce but I really like the texture of it uncooked.
And another terrible pic…
* A note about gf breadcrumbs: I absolutely hate store bought gf bread. It’s just nasty. However, it makes great breadcrumbs. I by a frozen brand (can’t remember the name of it but I’ll post it later after my next grocery store trip) and store it in the freezer. Then I just take out however many slices I need (usually 4), toast until golden, break apart into chunks, and leave on the counter all day. It’s good and dry by the time I need it and I just process in the food processor until it’s the texture of crumbs. And the high price tag of gf bread isn’t so bad if you know it’s gonna last you 4 recipes.
